Showing posts with label Letter T. Show all posts

Saturday, September 3, 2011

Kidamerinks Preschool: Letter "T"

"T" Week was a fun-filled week for us!

My Kidamerink was really excited to Learn about the Letter T this week because TRACTORS start with T!! He's got quite the passion for Tractors, which has become an obsession widely fed by his Grandpa.

Here are a few things that we did this week.


First of all, Have I told you how much I love these Eric Carle Flash Cards? I Highly Recommend them, they are on my "Favorite Things" list.

We pulled out the "T" to remind us of our Focus that week.

Eric Carle Animal Flash Cards


We did a few different worksheets found Here. This site is a great resource for worksheets. I like that it mixed a few different elements, instead of just tracing the letter. We practiced both upper case and lower case T.


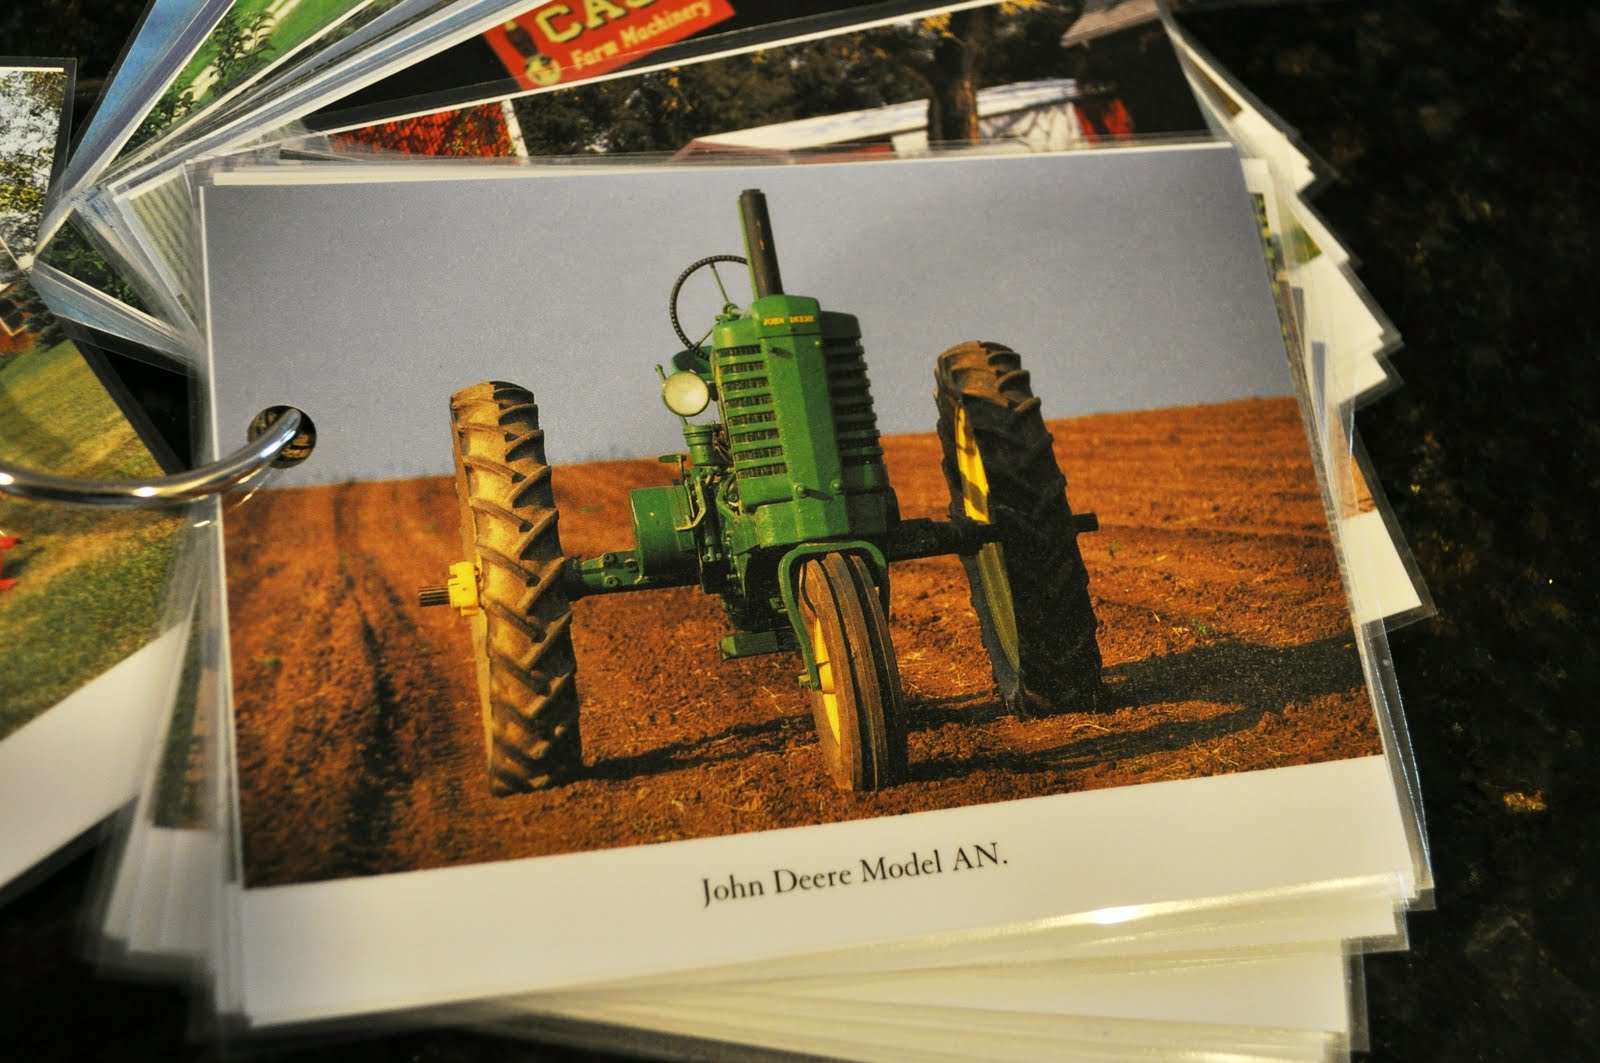
Because my Kidamerink is so obsessed with Tractors, I made him a little flip book. He actually had a cute tear-off calendar that was ALL Vintage Tractors. I had been saving them as the months went on so that I could make this book for him. I finally got around to it 10 months later as it is now September... but I now had a reason to actually do it! :) All I did was cut off the date, and laminated them back to back with the description of the tractor on the bottom. You could easily replicate this by going to a John Deere Tractor Store and getting one of their free Catalogs. Cut out the pictures of the Model Tractors, the name and laminate them back to back. Then, punch a hole through them and put them on a Binder Ring to keep them together nicely.


I made a few different Letter Wheels from the blog 1+1+1=1. This is seriously one of my favorite preschool sites, so go and check it out. She has a TON of FREE printables. We used the "farm" themed Clip and Learn, since Tractors were involved. My Kidamerink had fun matching up the letter with the picture.


We practiced size sequencing with different sized Tractors. My Kidamerink was good at putting them in order from Big to Little, and Little to Big. I got this Free Printable from 1+1+1=1 as well. It was part of the "Farm" Tot Book, page 12.


I had picked up a Model Tractor at Michael's on Clearance a while back, so we painted that and put it together. He was so proud of his Tractor that he built all by himself!!

They always have a ton of these in the kid craft section. They are normally priced $1-$2, and I scored this one for $0.30!!


We also did some Stickers. My Kidamerink was telling me all of the Model Names as he stuck them on the paper. Most of them were made up, but it was cute to hear what he came up with.

Ultimate Sticker Books: John Deere Tractors


For our Kidamerinks in the Kitchen Portion of Preschool, we made Twisty Bread.  It was quite Tasty, to say the least!! :)


We also did a Science Experiment about Dirt. Since Tractors help facilitate planting and our food, I decided it was an appropriate topic for this week to learn about Dirt. Here is the full experiment/biology lesson.

A Dirty Experiment.

The Books that we used this week to go along with our Tractor Filled "T" week were:

Farm Tractors (Pebble Plus: Mighty Machines)Tractors (Mighty Machines)Tractors (Paperback)(Blastoff! Readers: Mighty Machines)


A Dirty Experiment


 Get ready to get DIRTY!! 

When I told my Kidamerink that we were going to play in the dirt today, he looked at me in disbelief and said, "Really? I actually get to get my hands dirty?" When I replied yes, he exclaimed, "How cool! You never let me do that!!" Hmmm, I swear I'm not that controlling... but I don't like messy hands for the most part. My obsessive compulsiveness is rubbing off I guess. But, today we made an exception and got exceptionally dirty!

Since ourLetter this week has been T, and our theme has largely been about Tractors I decided to create a Biology lesson on soil. Since Tractors are used to plant/harvest food I deemed it appropriate. See the connection? Maybe I'm reaching, but it seemed like a good excuse to play in the dirt - which is every kids dream, right?

Anyways, Here is what we did.


First of all, we started out by reading, "Dig In - Learn About Dirt," by Pamela Hall. 
I then layed out our, "A Dirty Experiment" packet on the table. I am a visual person, so it helped to lay everything out in order to help us along with this experiment.


I may be a little OCD, but I felt the need to have organization when dealing with a potential mess...


Then, we got busy and procured some good ol' dirty DIRT!!


And, this may be self explanatory... but we placed a good heap of dirt <HERE>.

We started to dig in to see what we could find.


And, we tried to describe it and circled our answers on the sheet provided. 


Then we started separating it into the specified piles. 
Here was our "Sandy" pile - which was the majority of our good heap of dirt. We learned that we have very sandy soil.


Here is our "Silt" pile.


Our "Clay" pile.


And our "Plants/Critters" Pile. Luckily, we didn't find any big critters!! We had a lot of roots though.


All of our dirt separated into their designated piles.


A close up of our dirt. See how Sandy it actually was?


Then, we recorded our findings. My Kidamerink had lost a little bit of interest at this point. Well, I take that back. He just wanted to keep playing in the dirt, rather than draw or color an elaborate picture. So, here is his "quick" interpretation of our findings. The dots were sand, and the circle was a plant. :)


And, clean up was a cinch due to the fact that we separated the piles out on our printed card-stock.
<Sorry trees>


Here is the packet I created, which is hosted by Scribd. Go find out what is in your backyard with your own little Kidamerinks!


Thursday, September 1, 2011

Kidamerinks Twisty Bread

Since we have been learning about the letter "T" this week, I decided that our "Kidamerinks in the Kitchen" portion of Preschool would have to consist of Twisty Bread.

My Kidamerink LOVES Twisty Bread, but what kid wouldn't.

This is an easy recipe, and a great one for your Kidamerinks to help with. 

I have to argue that while it is not the "healthiest" snack in the world (it is a white bread) it is better than a store bought version and I like making a lot of our snacks from scratch so that I know exactly what is going into my kids.

These are also great with Spaghetti for Dinner! :) We just happened to make them for a snack this week, since it is "T" week!!

Here's what you need:

Ingredients: 
3 Cups Flour
1 1/4 Cups Warm Water
1 Tablespoon Olive Oil
1 Packet Fast Rising Yeast
1/2 Teaspoon Sugar
1/2 Teaspoon Salt
1-2 Tablespoons of Basil (according to taste - I like a lot of Basil)
1 Tablespoon Garlic Powder
1/4 Cup Grated Romano Cheese (or Parmesan)


Gather all of your ingredients.
 (The only things not pictured are the Water and Romano Cheese.)


Dump them all into your mixer, no matter what order. Dry, wet, granulated... whatever. Just throw it all in there. This is why this recipe is so kid friendly!

Then Mix together using a dough hook attachment. Mix on low for about 2-3 minutes, or until it forms a ball. 


The dough will be fairly sticky, but don't add anymore flour. Instead, scrape it out and form into a ball. Add a Teaspoon of Olive Oil to a bowl and coat the dough. Then cover and let it rise for 30 minutes, or until doubled in size.

Pre-heat your oven to 400 degrees. Then, roll out the dough into "snakes" as my Kidamerink says and twist them around eachother to make into Twisty Bread.


To finish it off, grate some Romano Cheese and sprinkle generously on top of the Twists. 
And, watch out for little hands... half my cheese sneaked away!! :)


Add a pinch of Garlic Powder to each one and they are ready for the oven. Let them "rest" for about 10 minutes before putting into the oven.

Bake for 10-12 minutes at 400 degrees, or until golden brown. 
 And then devour quickly... well, after they've cooled a bit!!

We dipped ours in Tomato Sauce.


And, there ya have it. Twisty Bread dipped in Tomato Sauce to complete our "T" week.

Mmmm... Tasty!! 

Find the Printable Version of this recipe hosted by Scribd.